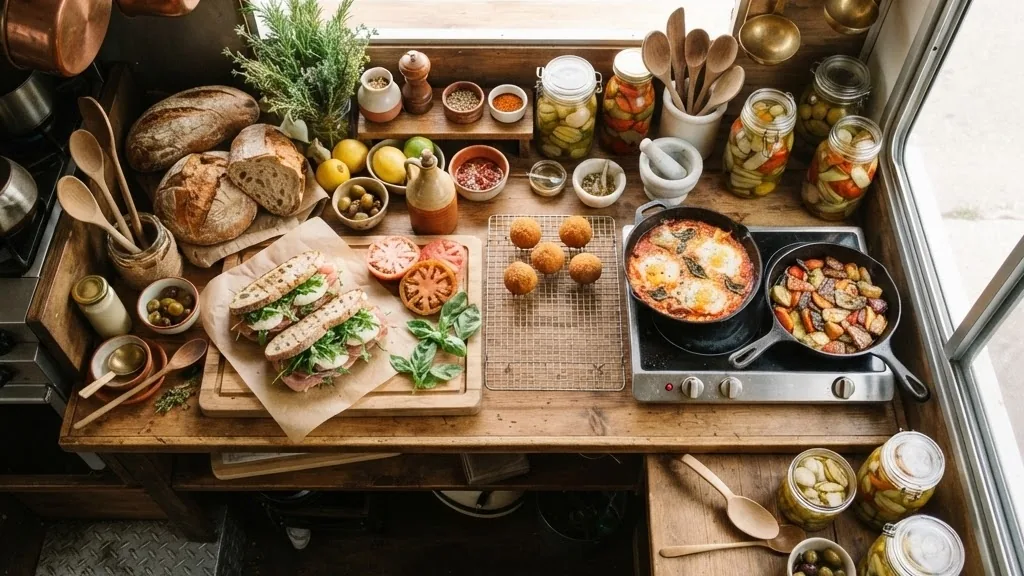
Food truck layout starts with a decision most first-time owners get backwards: they buy the truck, then try to cram equipment inside it. The order should run menu first, then equipment, then layout, then the vehicle that fits all three.
A fryer that measures more than 24 inches wide or 36 inches tall probably will not fit a standard interior, and that single measurement can eliminate half the trucks on the lot. Get the sequence right and the rest of the build stops fighting you.
The interior you are working with is narrow. Most trucks run 7 to 8 feet wide and 14 to 24 feet long, with 16 to 18 feet being the most popular size. Everything below is built around those constraints and the codes that govern them.
Quick answer: A working food truck layout keeps the aisle at 30 to 36 inches, sets counters at 36 inches high and 24 to 30 inches deep, and splits the space into prep, cook, and serve zones with cold storage near the service window. Water tanks must follow the rule that the gray water tank sits at least 15 percent larger than the fresh tank. Grease-producing equipment triggers a UL-300 wet chemical suppression system under an NFPA 96 hood. Plan equipment before you buy the truck, not after.
Get the Decision Sequence Right Before You Spend a Dollar
The correct build order is menu, then equipment, then layout, then truck. Your menu dictates which appliances you need, the appliances dictate their footprint and clearances, and only then can you size the box that holds them.
Buying the vehicle first inverts this and forces compromises you pay for daily. A taco griddle, a smoker, and a fryer each carry different footprints, ventilation loads, and fire ratings, so the equipment you commit to literally determines which used truck is even purchasable.
A professional build takes real time, so use that window to lock the menu before metal gets cut.
- Menu first: Decide your five to eight core items and their cook methods.
- Equipment second: List each appliance with real width and height, then check the >24 in wide or >36 in tall rule.
- Layout third: Map appliances against a 7 to 8 ft wide interior.
- Truck last: Shop for a chassis that swallows the plan.
Here is what that sequence looks like on paper. Say your core menu is smash burgers and fries. Your equipment list runs a 36 inch flat-top griddle, a single-basket fryer at 15 inches wide, an undercounter fridge, and a small prep table.
Stack the griddle and fryer under one 8-foot hood section, and you have already used about 51 inches of your 100 to 140 linear inch wall budget on one side. That leaves room for a prep table and dry storage on the same wall, with the fridge and sink work going opposite. Only after that math is done should you start calling truck sellers, because now you know you need at least a 16 foot interior to keep the aisle at 36 inches without stacking equipment on both walls too tightly.
If you are still choosing a concept, cost math varies wildly by cuisine. Our breakdown of ice cream food truck startup costs and profit math shows how a dessert build reshapes the whole equipment list before layout ever enters the picture.
The Real Dimensions: Width, Length, Aisle, and Counter
A food truck layout lives or dies on a handful of measurements, and vague guidance is the reason so many builds feel cramped. Interior width sits at 7 to 8 feet, length runs 14 to 24 feet with 16 to 18 feet most common, and street-legal height stays under 14 feet, dropping to 13.5 feet in New York City.
Custom builds stretch to 21 to 30 feet long. The aisle is the number that determines whether two people can pass without a collision, and the counter height decides whether your staff finishes a ten-hour shift with an aching back.
The FDA Food Code sets a recommended minimum aisle of 30 inches. Most operators building for a two-person crew push to 36 inches because it is faster and safer when bodies are moving with hot pans.
- Aisle width: 30 in minimum per the FDA Food Code; 36 in for multi-person crews.
- Counter height: 36 in standard.
- Counter depth: 24 to 30 in.
- Wall equipment budget: roughly 100 to 140 linear inches per side on a 14 to 22 ft build.
Weight matters too. Staying under the threshold that requires a special permit matters, and a generator or propane bank eats into both weight and height.
A rooftop generator box can add 10 to 14 inches to your overall height budget, which matters if you are already close to the 13.5 to 14 foot ceiling. If power sizing is your bottleneck, the numbers in our food truck electric generator sizing and code guide pair directly with these layout constraints.
One measurement operators skip is doorway and step-up clearance. A service window that opens too close to a rear step forces staff to duck or twist mid-service, which slows every single order during a rush and creates a repetitive strain injury over months. Measure the walking path from prep table to window before you finalize cabinetry, not after installation.
Three Zones and a Spaghetti Diagram for Clean Workflow
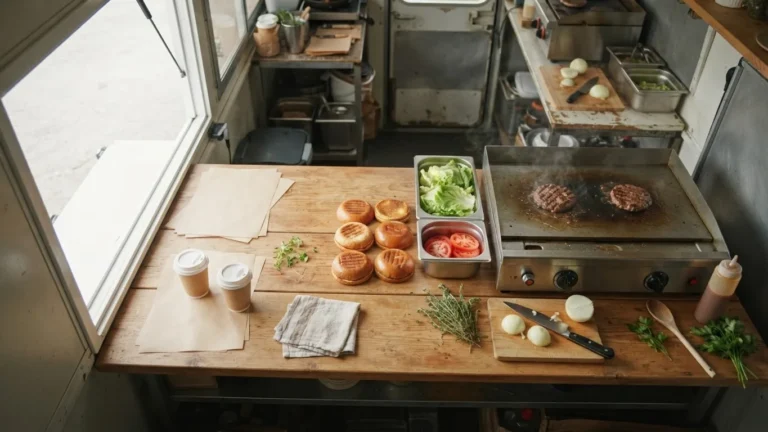
Every efficient food truck layout separates into three functional zones: prep, cook, and serve. Prep handles cutting, portioning, and cold assembly. Cook holds the heat-generating equipment. Serve sits at the window with cold display and finished-item staging.
Keeping these distinct stops raw and ready food from crossing paths and keeps two staff from constantly trading places in a 30-inch aisle. The tool that exposes bad flow before you build is the spaghetti diagram, where you draw every path a worker walks during a single order and hunt for lines that cross.
Place cold storage and display near the service window. That keeps the last touch of an order close to the customer and shortens the walk on your busiest station.
- Prep zone: refrigeration, cutting surface, dry storage above and below counter.
- Cook zone: griddle, fryer, or range under the hood, tools within one pivot.
- Serve zone: window, cold display, POS, expo counter.
Before any cabinetry is ordered, tape a full-scale mockup of the floor plan on a garage or driveway using painter’s tape. Walk the imaginary shift. You will move a station or two, and moving tape is free while moving stainless steel is not.
This crossing-path discipline is exactly why the burger truck guide on costs and margin math devotes so much attention to station spacing when volume climbs.
A common mistake in a two-person crew is placing the POS and the expo counter on opposite ends of the serve zone. That forces one worker to cross the other’s path on every single transaction. Put the register within arm’s reach of the window and the expo shelf, so one person can take payment, plate, and hand off the order without turning around.
Sinks and Water: The Ratios Inspectors Actually Check
Water is where a food truck layout meets the health department head-on, and the specs are not negotiable. You need a three-compartment sink for wash, rinse, and sanitize, plus a separate dedicated handwashing sink.
The FDA Food Code drives these requirements, and the NSF/ANSI 2 standard from NSF International certifies the food-contact equipment itself. The handwash sink must deliver water at 100 degrees F (38 degrees C) or higher, stocked with soap, paper towels, and a trash bin, and it has to sit within 25 feet of the prep area.
Tank sizing follows a hard ratio: the gray water tank must be at least 15 percent larger than the fresh water tank. Run 40 gallons fresh and you need 46 or more gallons gray.
- Three-compartment sink: wash, rinse, sanitize.
- Handwash sink: separate, water at least 100 degrees F (38 degrees C), within 25 ft of prep.
- Tank ratio: gray at least 15 percent above fresh (40 gal fresh gives 46+ gal gray).
- Materials: 430 stainless can rust in 2 to 3 years; 304 stainless holds up.
A turnkey sink station bundling a space-saver three-compartment set, a handwash sink, and a 6-gallon water heater runs about $1,000 to $1,600. Spend the extra for 304 stainless.
Fresh water capacity should be sized against your busiest projected day, not your average one. A truck doing 150 transactions on a festival Saturday burns through wash water far faster than a slow Tuesday lunch service, and running out of hot water mid-rush means shutting the line down until a refill. Many operators oversize the fresh tank above their calculated need specifically to cover that gap.
The USDA and FSIS publish general food-handling standards worth reading before your first inspection; you can review core guidance on the FSIS safe food handling and preparation page. For pantry organization that survives a tight prep zone, the checklist over at pantry basics translates well to mobile storage.
Ventilation and Fire Suppression: NFPA by the Number
Fire code is the densest layer of any food truck layout, and it is governed almost entirely by the National Fire Protection Association. Grease-producing equipment such as a fryer, grill, or griddle requires a Type I hood that captures grease-laden vapors under NFPA 96, whose 2024 edition includes Chapter 17 written specifically for mobile operations.
Heat-only equipment can use a Type II hood. Any appliance producing grease vapors also triggers a UL-300 listed wet chemical suppression system, covered by NFPA 17A.
Portable extinguishers fall under NFPA 10. At minimum you carry one Class K unit for cooking oils plus one ABC rated 2A:10BC.
- NFPA 96: hood, duct, and exhaust for grease vapors (2024 edition, Chapter 17 for mobile).
- NFPA 17A and UL-300: wet chemical suppression system.
- NFPA 10: extinguishers, minimum one Class K plus one ABC 2A:10BC.
- NFPA 58: LP gas (propane) handling.
If you run any open flame or non-electric appliance, a carbon monoxide detector is mandatory. NFPA 1, the Fire Code, addresses mobile cooking operations in section 50.7, and Underwriters Laboratories is the body behind the UL-300 listing your suppression installer must meet.
Remember that the local authority having jurisdiction, meaning your fire marshal and health department, can impose stricter rules than any national standard, and their amendments win.
Type I versus Type II is worth spelling out because operators mix them up constantly. Type I hoods handle grease-laden vapor and require ductwork, fire suppression, and grease filters. Type II hoods only remove heat, steam, and odor, with no grease load, and they are far cheaper to install because they skip the suppression system entirely.
A coffee or smoothie truck with no fryer or open flame can often run a Type II hood or skip hood ductwork altogether, which frees interior height and wall space for refrigeration instead. Confirm this choice with your local fire marshal before you assume you qualify, since a griddle alone, even without a fryer, is usually enough to require Type I.
Electrical and gas safety also intersect with layout in ways that get overlooked. OSHA and state-level codes such as California Title 8 govern clear access to electrical panels and aisle obstruction, meaning you cannot store equipment in front of a breaker box even if the wall space looks free. Propane tanks under NFPA 58 need dedicated, ventilated exterior compartments, which typically sit at the rear or a side hatch rather than inside the cook zone, and that placement decision affects your rear step and door clearance too.
Floor Plans by Menu: Fried, Griddle, BBQ, Drinks, Dessert
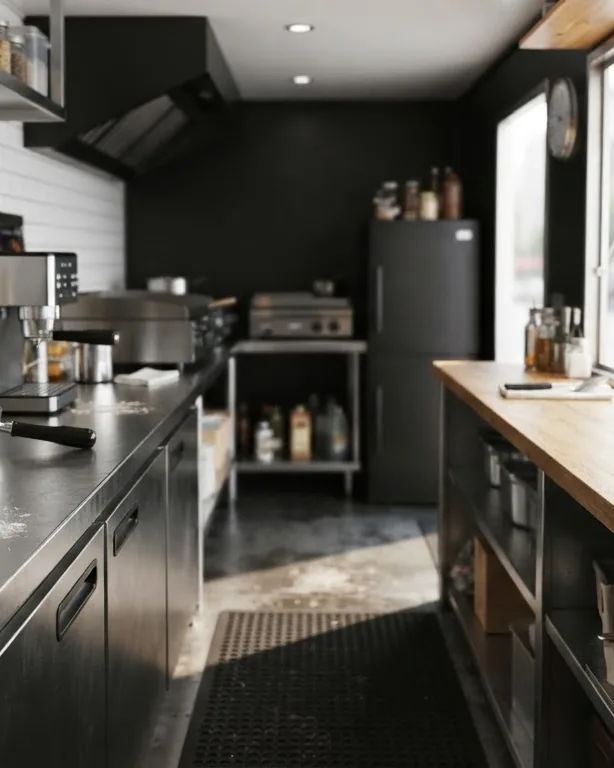
A food truck layout that works for tacos will fail for a smoker, because equipment footprints and ventilation loads change with the menu. The generic single floor plan pushed by most guides ignores this.
Instead, plan around your cook method, budgeting roughly 100 to 140 linear inches of wall equipment per side on a 14 to 22 ft build, and always pull cold storage toward the service window. Below are the practical starting points for five common concepts, each sized to the 7 to 8 ft wide, 16 to 18 ft popular footprint.
Fried and Griddle Builds
Fry and griddle concepts pack the most heat into the least space. Both demand a Type I hood and UL-300 suppression, so the cook wall gets dense fast.
Keep the fryer and griddle side by side under one hood to consolidate ductwork, and hold the aisle at 36 inches because oil and fast movement do not forgive 30.
Position an undercounter fridge, standard at 34 inches high and drawing about 1 to 3 amps running, on the opposite wall in the prep zone so cold ingredients never cross the hot line.
BBQ, Smoker, and Beverage Builds
Smokers often live outside or vented through a dedicated stack, which frees interior wall length for holding and slicing counters, so a BBQ layout leans on counter depth of 24 to 30 inches for portioning.
Beverage and smoothie trucks flip the priority entirely: less heat, more refrigeration and display right at the window. A dessert or drinks build may skip the Type I hood altogether if nothing produces grease vapor, but a blender-heavy smoothie truck still lives and dies by fresh and gray tank sizing at that 15 percent ratio.
Menu inspiration shapes these plans too. A comfort-food concept in the spirit of cheesy baked mostaccioli leans on oven and holding space, while a lighter, health-forward window drawing on high protein recipes tilts toward cold prep and assembly.
A noodle-forward concept built around something like vegan pho shifts the whole layout toward a stockpot station and holding broth, trading fryer space for simmer and ladle-line room near the window.
Trucks selling frozen-to-fast items can borrow prep logic from air fryer frozen foods recipes to shrink their hot footprint.
Service Window Configurations Worth Comparing
Beyond the cook wall, the shape of your service window changes the entire floor plan. A single side window is the most common setup and works well for a linear prep-cook-serve flow on a 16 to 18 foot truck, since one wall stays dedicated to equipment and the other to walking room.
A walk-up window at the rear of the truck, sometimes paired with a small patio setup, suits trucks parked long-term at one spot rather than moving daily, since it needs more exterior space for customers to queue.
A pass-through or double-sided service configuration, with windows on both sides, is rare but works for high-volume festival trucks that need to serve two lines at once. It demands a wider aisle, typically the full 36 inches, because staff must reach counters on both sides without a fixed back wall to work against.
The Costs Behind Every Layout Decision
Budget frames every food truck layout choice, and the spread is wide. A used truck runs roughly $30,000 to $100,000, while a new custom build lands between $100,000 and $200,000.
The gap is not vanity: a custom build lets you place equipment before the shell exists, which is the whole advantage of the menu-equipment-layout-truck sequence. Buying used means reverse-engineering your plan into someone else’s box, and that is where the >24 in wide, >36 in tall equipment rule quietly kills options. Every inch of the 100 to 140 linear inches per side carries a dollar figure.
Small line items add up. The sink station cost, suppression service intervals, and the difference between 430 and 304 stainless all compound over a truck’s life.
- Used truck: $30,000 to $100,000.
- New custom build: $100,000 to $200,000.
- Turnkey sink station: $1,000 to $1,600.
A useful way to think about the used-versus-custom decision is retrofit cost. If a used truck is missing a Type I hood, adding one after the fact, including ductwork and a new UL-300 suppression system, adds significant cost depending on your market, sometimes closing most of the price gap with a custom build that comes with the hood already installed and permitted.
Standardizing your buildout with reusable documents saves real money on the second and third truck; our roundup of the templates that actually run a food truck covers the paperwork side that a layout plan alone leaves out.
Common Layout Mistakes and How to Fix Them
Most layout failures trace back to one of a handful of repeatable mistakes, and catching them on paper is far cheaper than catching them after installation.
- Aisle too narrow for the crew size: a 30 inch aisle works for one person but creates constant collisions with two. Fix by widening to 36 inches even if it means trimming counter depth to 24 inches on one side.
- Handwash sink placed too far from prep: anything beyond the 25 foot rule fails inspection and slows compliance in daily use. Fix by relocating it adjacent to the prep counter, not tucked in a back corner.
- Equipment purchased before measuring the truck: an oversized fryer or range that exceeds the 24 by 36 inch rule of thumb simply will not clear the door or the wall run. Fix by measuring every appliance’s actual footprint, including door swing and vent clearance, before ordering.
- Cold storage placed far from the window: this adds unnecessary steps to every single order during a rush. Fix by moving the display fridge or freezer to within arm’s reach of the service window.
- Gray tank undersized relative to fresh: running out of gray tank capacity mid-shift forces an early shutdown even if you still have fresh water left. Fix by holding to the 15 percent minimum, and consider going higher if your menu is wash-intensive.
Prototype With Painter’s Tape Before You Cut Metal
The cheapest fix to a bad food truck layout is the one you make on the floor of a garage with a roll of painter’s tape.
Lay out the full 7 to 8 ft by 16 to 18 ft footprint at real scale, mark every appliance with its true width and the 34-inch fridge height in mind, and set the aisle at 30 or 36 inches to feel the difference physically. Then run a mock shift: prep an order, walk to the cook line, plate at the window, wash at the three-compartment sink. Cardboard boxes stand in for equipment.
You will catch collisions the spaghetti diagram missed and confirm the handwash sink truly sits within 25 feet of prep.
- Tape the interior at full scale.
- Mark appliance footprints and hood coverage.
- Walk three full mock orders.
- Move tape until zero paths cross, then order steel.
Run this mockup with the actual number of staff you plan to schedule during peak service, not just one person. A layout that feels spacious solo can turn into a bottleneck the moment a second cook and a cashier are working the same aisle at once, and that difference only shows up once you walk it with real bodies.
For a wider view of how compliance and food-safety habits fit around the physical build, the consumer-facing resources on the FoodSafety.gov four steps to food safety page reinforce the clean-flow logic behind zone separation. The CDC also tracks foodborne illness patterns that justify the sink and temperature rules baked into your plan.
Frequently Asked Questions
What is the minimum aisle width for a food truck layout?
The FDA Food Code sets a recommended minimum aisle of 30 inches. Most operators building for a two-person crew widen it to 36 inches, because passing safely with hot pans and moving quickly during a rush is far easier with the extra 6 inches. On a 7 to 8 ft wide interior, that aisle choice shapes every other measurement.
How big should my gray water tank be compared to fresh?
Your gray water tank must be at least 15 percent larger than your fresh water tank. If you carry 40 gallons of fresh potable water, plan on 46 gallons or more of gray water capacity. Inspectors check this ratio directly, and undersizing the gray tank is one of the most common reasons a mobile unit fails its first health inspection.
Do I always need a fire suppression system?
Any equipment producing grease-laden vapors, such as a fryer, grill, or griddle, requires a UL-300 listed wet chemical suppression system under NFPA 17A, plus a Type I hood under NFPA 96. A drinks or dessert truck with no grease-producing appliances may avoid it, but always confirm with your local fire marshal first.
What sinks does a food truck layout require?
You need a three-compartment sink for wash, rinse, and sanitize, plus a separate dedicated handwashing sink. The handwash sink must supply water at 100 degrees F (38 degrees C) or hotter, with soap, paper towels, and a trash bin, and it must sit within 25 feet of the prep area per the FDA Food Code and NSF/ANSI 2 equipment standards.
Should I buy the truck or design the layout first?
Design first. The correct order is menu, then equipment, then layout, then truck. Because any appliance wider than 24 inches or taller than 36 inches likely will not fit a standard interior, the equipment you commit to determines which vehicle is even purchasable. Buying the truck first forces you to compromise the plan around someone else’s box.
How much does a full food truck build cost?
A used truck runs about $30,000 to $100,000, while a new custom build costs roughly $100,000 to $200,000. The custom path lets you place equipment before the shell exists, which is the core advantage of designing the layout early. Smaller items like a turnkey sink station and ongoing suppression inspections add to the lifetime figure.